Below is my attempt at a tutorial/exposition on a piston-driven, turntable-timed (because 2.70 came out as I was working on the bio clock!) automated hemp farm. It is by no means the most compact, clean, or efficient build. I am sure there are many things that could be changed to make it better. And I’d actually welcome those suggestions. But, after watching Battosay’s videos and playing some with pistons in the 1.7 update, I wanted to give this a try.
I intended this to function as my only needed supply source of hemp fiber. Given that, I designed it to be expandable should I discover that I needed more production.
Space requirements
For each course, you will need at least a ten by fifteen stretch of ground. Above ground or underground doesn’t matter, though I found it much easier to install the mechanical elements with dirt to move around instead of stone. If you put multiple courses side by side, it only takes an additional nine blocks in width, as you can double up one row of blocks in between each course. You will also need to dig out a goodly amount of space (at least 8-10 blocks down) at the front of the farm for the collection apparatus.
There are three distinct construction elements:
- 1. The Farm
2. The Collection Apparatus
3. The Automation
Your first step is to frame out your farm’s footprint. There are four row types you’ll need to build. Rows 2-4 are all built on either side of the water channels, so you build each twice, just on opposite sides.
- 1. Central water channels
2. Growth rows
3. Piston support rows
4. Restone rows
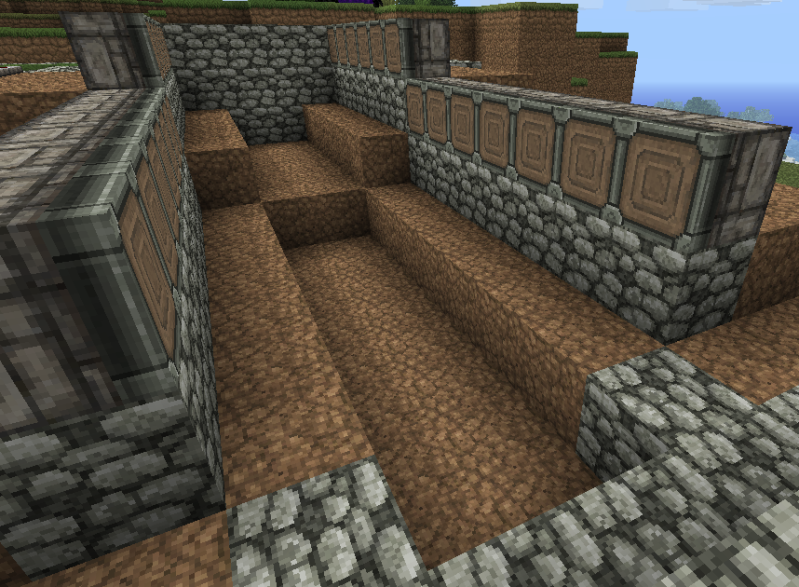
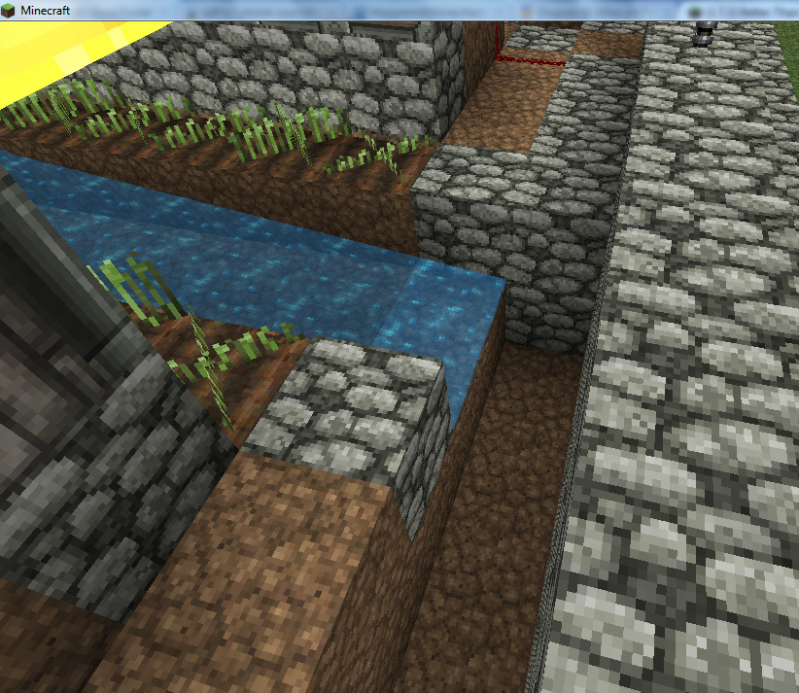
On either side of the water channels are your growth rows. These are, obviously, one up from the channels and need to be made out of dirt. They should also start of the back of the farm and run six blocks before dropping down one block to run another seven. There needs to be an eighth block as well to cap the growth row and funnel the water into the drop to the collection point, but it doesn’t have to be dirt. I used cobble just to make a clear contrast signaling the end of the growth row.
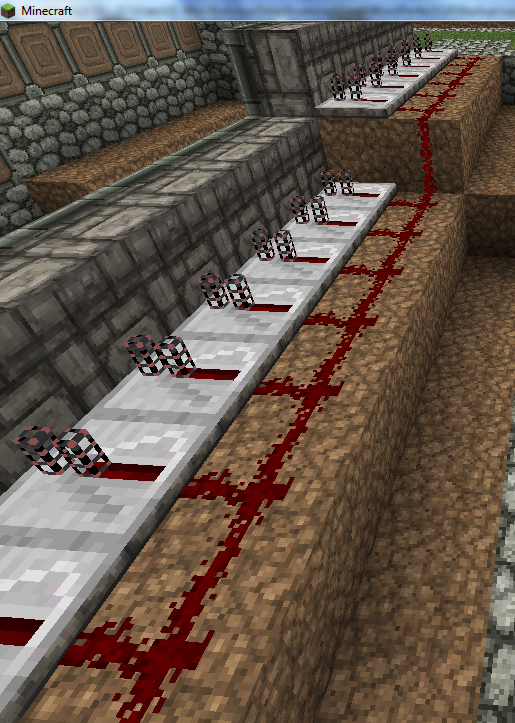
The next row is the piston support row. This row of blocks should be one higher than your growth rows. Your pistons will be placed on top of these blocks, making them two above your growth row and ensuring that you only knock off the level two growth on your hemp plant. It’s a personal preference, but I like to put my pistons down on cobble, rather than dirt - it has no functional difference.
The final row is the redstone row. This should be at the same level as the piston support row and can be any substance that redstone can be placed on.
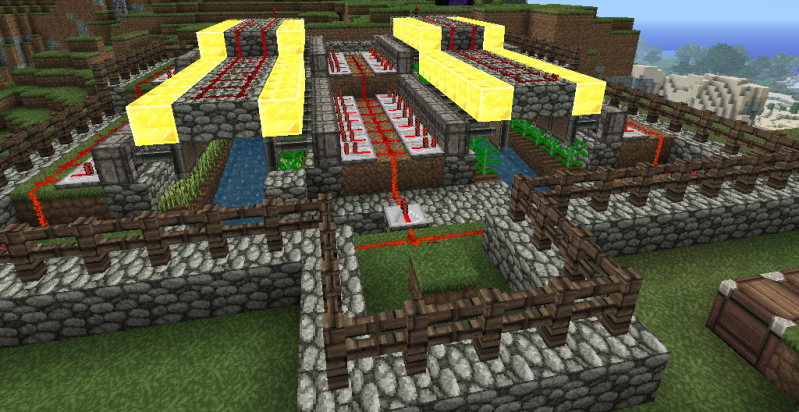
When you are finished, it should look something like this:
Spoiler
Show
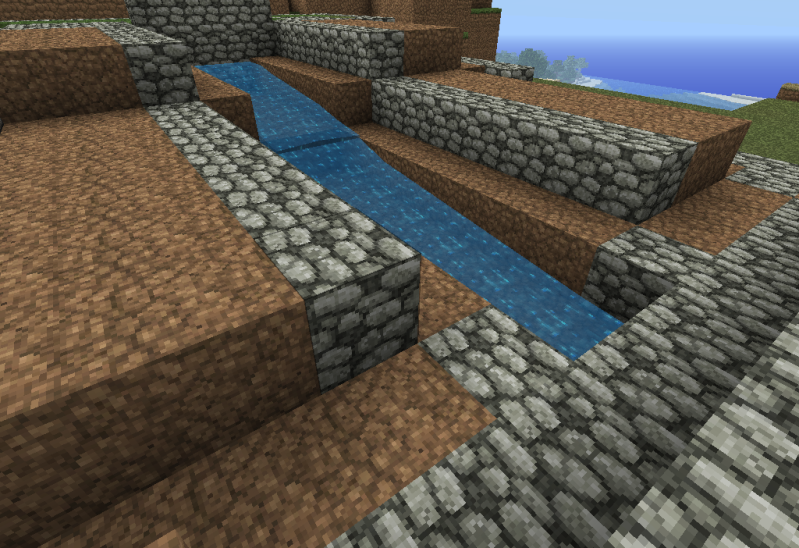 I included the water just so you would have a good picture of the layout, but I’d suggest not placing it until close to the end. It’s much easier to work without fighting the current.
Spoiler
Show
String the repeaters along behind the pistons, setting up a series that will trigger each piston on both rows at the same time. When you’re finished, each row should look something like this.
Spoiler
Show
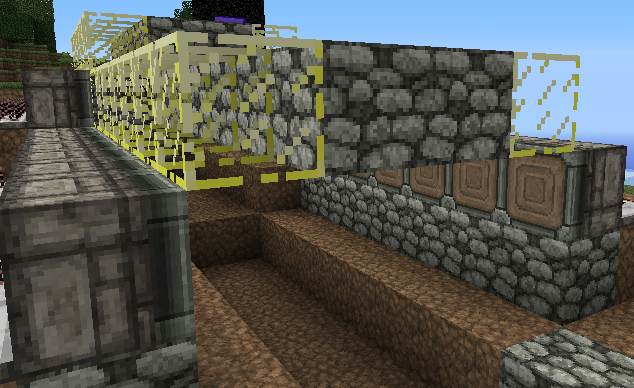
Obviously, you need to light your hemp to maximize growth speed (or to substitute for sunlight, if you are underground). I chose to run two simple cobblestone rows down the center of the farm that simply mirrored the contour of the water channel, just two blocks higher. This gives you the perfect framework to hang your 26 light blocks on (78 glass, 26 glow dust, 26 redstone). You want to make sure that when you place the light blocks, they effectively close off the growth rows from the outside. If they are too high, not only does it waste space, but the hemp won’t grow as quickly, if at all.
Spoiler
Show
Spoiler
Show

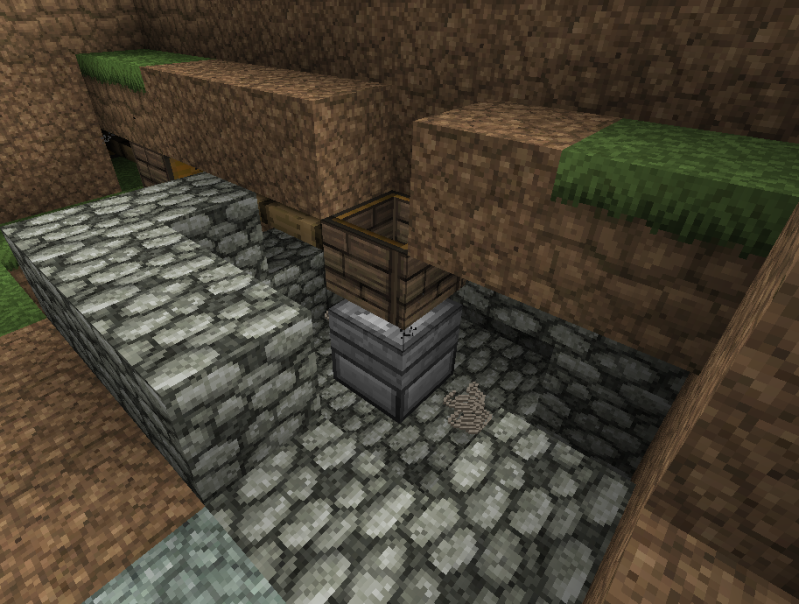
2. The Collection Apparatus
You will need several elements for your collection apparatus. Obviously, you will need a waterwheel (or windmill, if that is your choice, a millstone, two hoppers (add another hoppper for each additional farm you add), and plenty of axles and gearboxes.
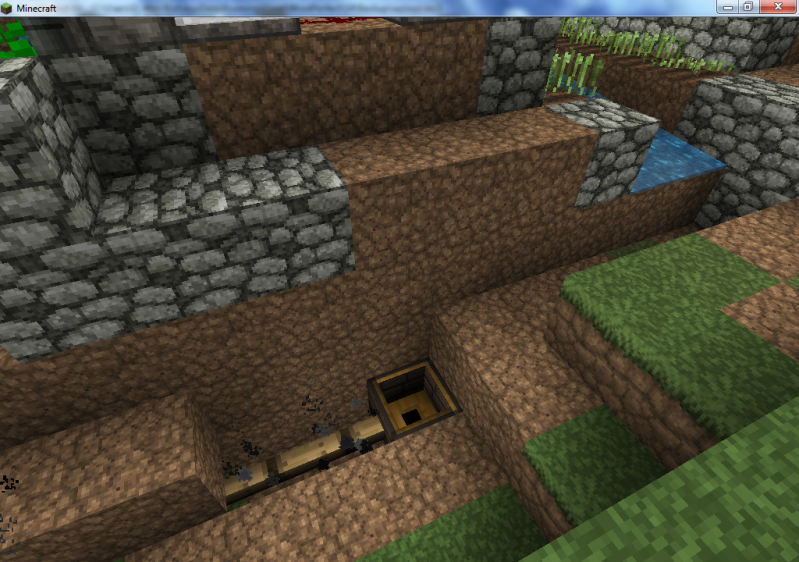
I had a handy cliffside near my farm, so I actually stuck my waterwheel on the outside of the cliff wall and ran the axles into the side of the mountain, just for the pure aesthetic pleasure of it. But you can obviously place your waterwheel wherever you’d like, so long as you are willing to run power to your collection location. If you are planning on placing more than one farm, I’d recommend placing your collection apparatus equidistant between your farms. It makes no real difference, it just means you won’t have to wait for water to carry your hemp the entire length of your farms.
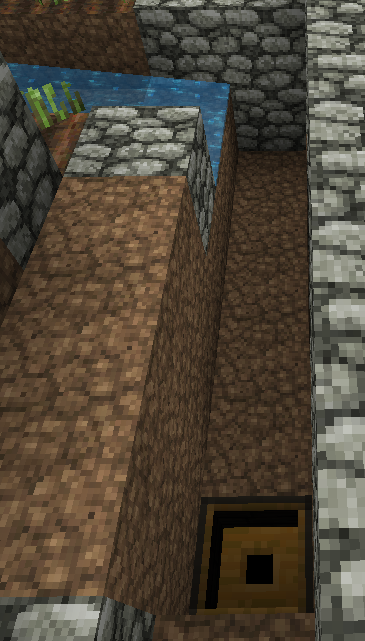
Your first step is to dig out your collection channel. This is the path that your hemp will flow down towards your first hopper and your millstone. To do this, you are going to want to start your channel at the corner on the opposite side of where you want your collection apparatus. And you want to start the channel on the second block past the end of the growth row. So there should be a dirt block extending past the growth row, and then you start digging your channel. This creates a natural stopping point for the water carrying your hemp from the plants themselves and allows the hemp to simply drift off into the collection channel. When you are ready to start collecting your hemp, you’ll place water in the corner of the collection channel, bringing it to the hopper. It should look something like this:
Spoiler
Show
Spoiler
Show
Spoiler
Show
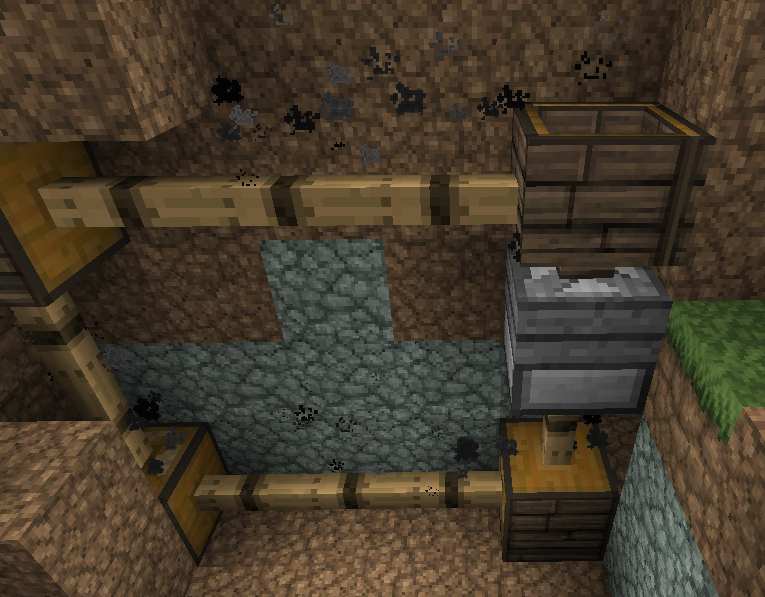
Your first power receiver should be the collection hopper. This will allow the hopper to transfer its items into the mill stone we will place beneath it. It gets a bit tricky here, as millstones have to be powered from above or below. So I ran a spur off of the closed gear box to allow me to come up from beneath the mill stone and input power there. Make sure you do not have any gearboxes or axles directly next to the millstone. You need to leave these blocks clear so that it can spit out its ground product. This takes up more space than you realize, though if anyone sees a way to save some space, I’m open to the suggestion. Mine came out looking like this:
Spoiler
Show
Spoiler
Show
3. The Automation
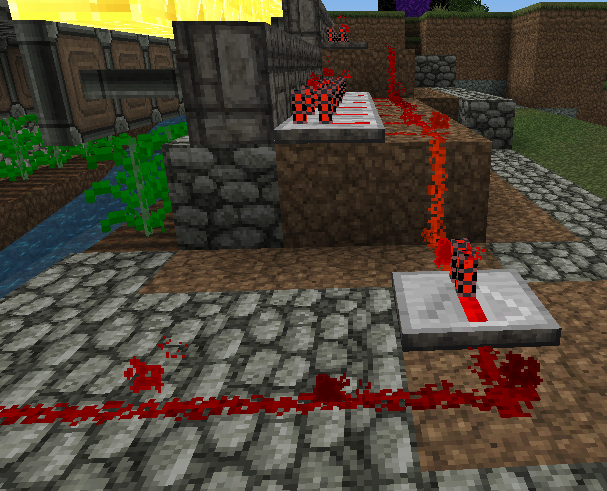
Once you have your collection apparatus set, don’t fill the space in around it! You’ll need to place one more set of mechanical power transfer blocks for your timer. With 2.70, Flower has given us the gift of timing! The turntable is you friend and can be used very simply to create automatic timing. No more detector blocks, block dispensers, and unreliable bio clocks. Now you can truly automate your hemp harvesting.
Before you place your turntable, you will need to figure out where it should be. To do this, extend the wire from the very first redstone row block for every row of pistons you have. This should give you a single redstone wire on the “ground level” in front of the redstone row. Because of the length of the piston row, you need a redstone repeater here to amplify the signal. So plop one of those down for each piston row you have.
Spoiler
Show
Spoiler
Show

Spoiler
Show

Spoiler
Show
Known problems:
- Seeds clogging up the millstone. It’s not a common problem, especially with three grinding slots on the millstone, but I left access to my mill stone underground so that I could clean it out.
- Ducks getting into the collection space and turning hoed land into dry ground. You can fix this by fully enclosing it, but even then, I think there’s a chance for spawning just because of the water in the growth channels.
- Piston extension blocking hemp growth. There might be a pulse trigger option for redstone that I simply don’t know how to do which could fix this problem. Somehow it might trigger the pistons only long enough to cause them to extend, but not keeping them extended during the torch’s rotation on the redstone wire.